User Interface#
At the core of Bushfire Pro lies an intuitive web map interface that allows you to carry out a complete job seamlessly. These web maps are not only interactive but also smartly automated to reduce manual inputs, enhancing your efficiency.
In this section, we will get familiar with the web map interface before guiding you through the creation of your first project.
Components of the Web Map in Bushfire Pro#
Let’s go over the different parts of the web map.
This will help you use the app more easily and get your work done faster.
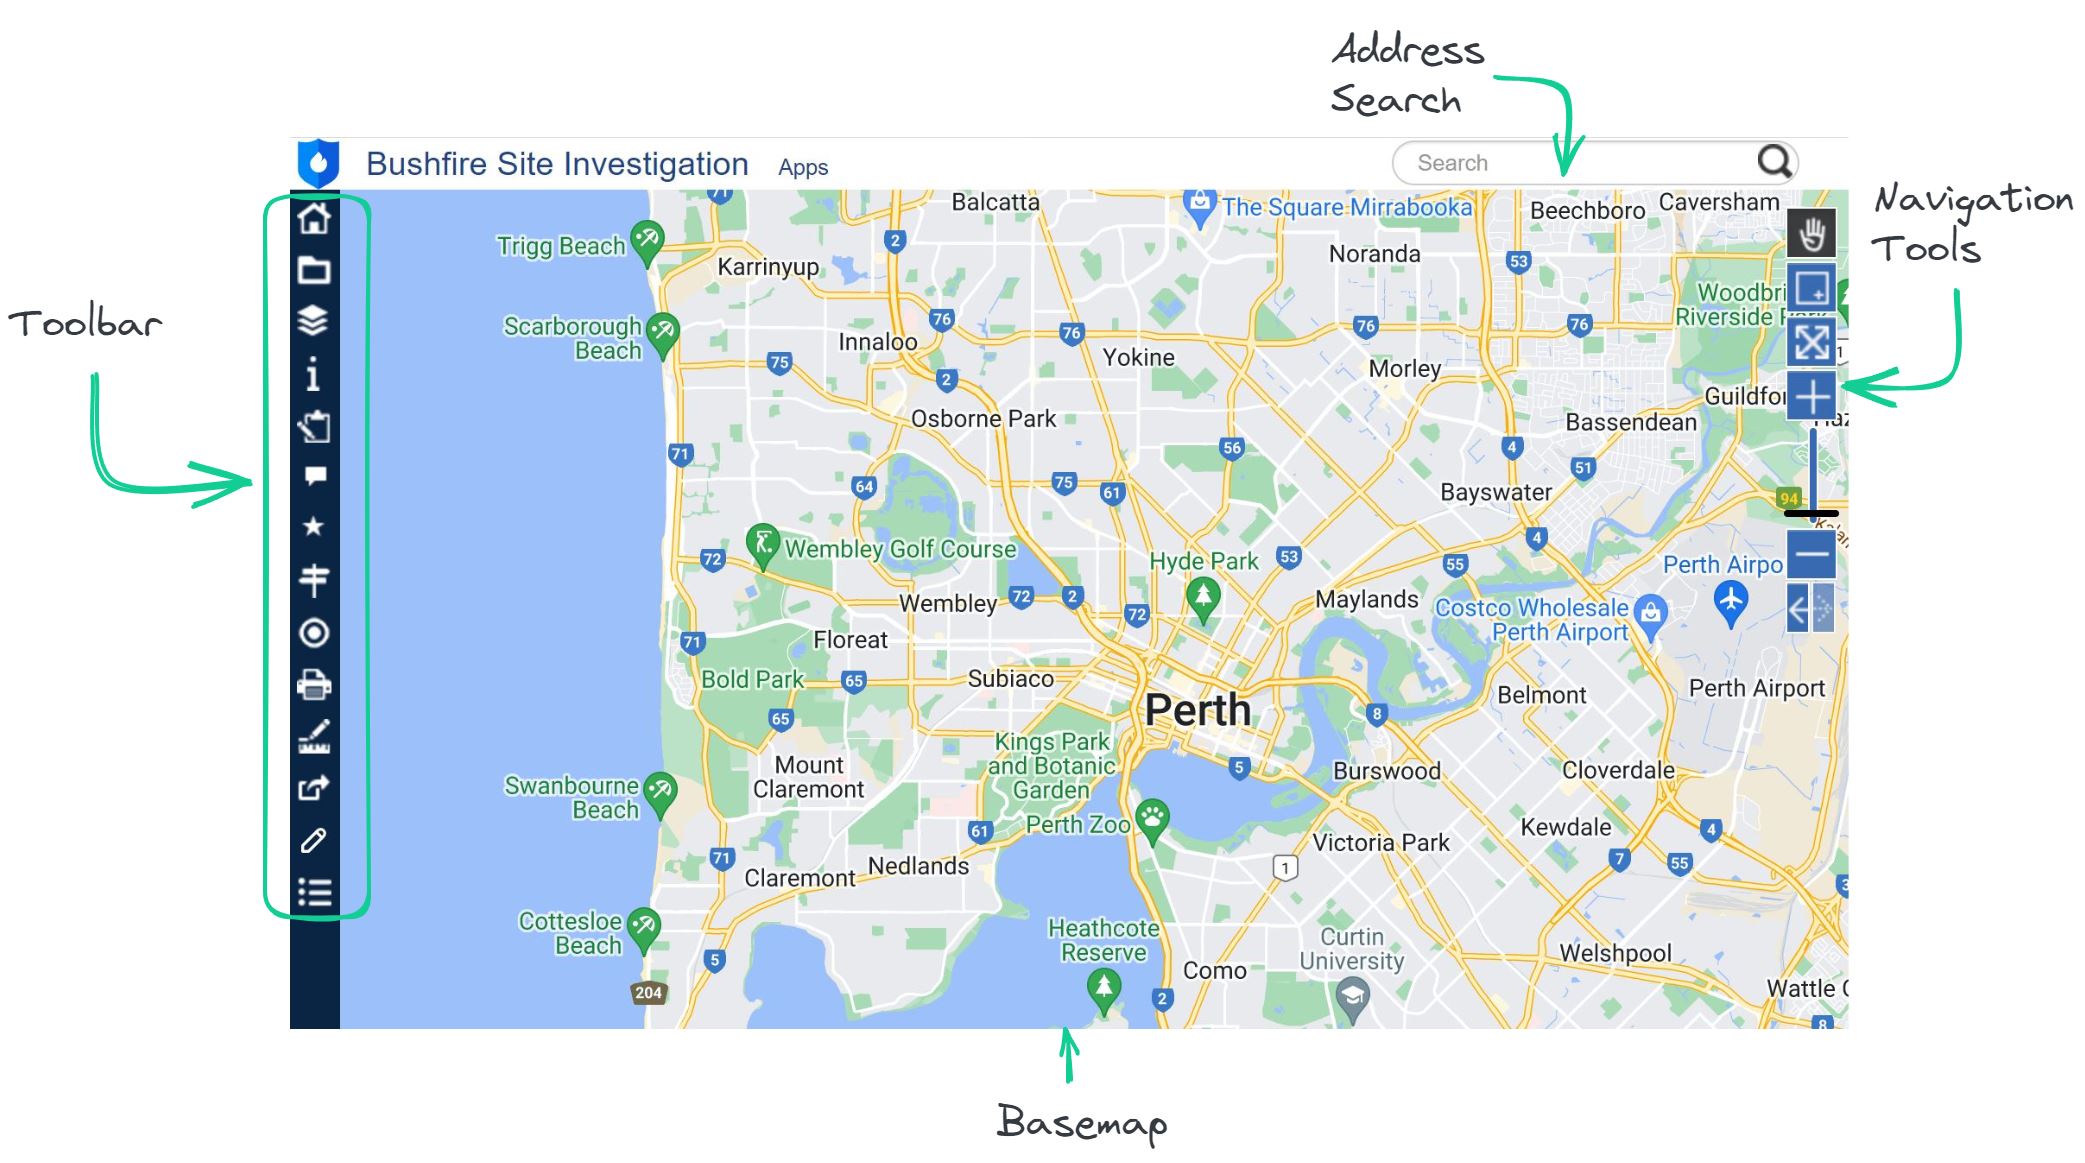
Toolbar: This is where you’ll find functionalities for turning layers on/off, editing, and printing high-quality maps, among other things.
Address search: Powered by Google Maps, this feature allows you to quickly locate your site address.
Navigation Tools: Those arrows at the bottom are useful for going back and forth between previous map extents.
Basemap: This can be changed to different types of aerial imagery via the Layers menu.
Toolbar Overview#
Key Functionalities#
The Toolbar is the control center of the web map, where you’ll find various functionalities for editing, layer management, and map printing. Here are the key ones:
Layers
 : Layers that are greyed out are out of range and require zooming in to become active. Simply tick the box next to a layer to display it on the map.

Editing
 : Multiple layers can be edited. To edit a layer, select the one you wish to modify, then draw on the map (click to drop vertices and double-click to end digitising). Then complete the attribute form and press “Save.”
Note
For additional editing and digitising functionalities, refer to Section X.
Printing
 : Printing high-quality maps is straightforward. You can select your page size, adjust the extent and scale, input your project details, and choose your print format (PDF, JPG, etc.).
Note
Need your maps to stand out? Get in touch to make your maps reflect your brand.
Detailed Toolbar Menu#
Icon |
Tool |
Description |
|---|---|---|
|
Layer Menu |
Toggle and manage different data layers on the map. |
|
Editing |
Modify existing map features or attributes. |
|
Popup |
Display detailed information about a feature when clicked on the map. |
|
Selection |
Choose to display/hide specific features on the map for analysis or printing. |
|
Locate |
Quickly zoom to a project location. |
|
Geolocation |
Identify your current physical location enabling working on the field. |
|
Printing |
Generate a high-quality map of the current map view. |
|
Measure |
Determine distances or areas directly on the map. |
|
Draw |
Add annotations or load a GPS file to the map. |
|
Data |
View your project data in a spreadsheet form. |
What’s Next#
Now that you’re familiar with the interface, let’s introduce the layers that are available to assist with developing your project.